Warning signs in Pennsylvania
The Pennsylvania Driver's Manual shows or names everything on this page: 54 in all, on pages 13–17, 24–25, 62.
Independent educational site · not affiliated with any government agency or DMV
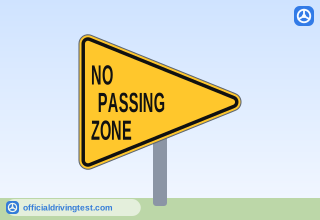
NO PASSING ZONE
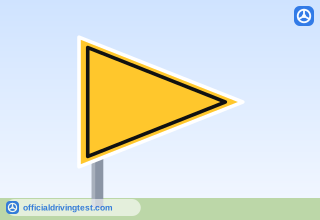
This is the only pennant-shaped warning sign. This sign marks the beginning of a no passing zone and is placed on the left side of the road facing the driver.
Manual page 13 · Open this page in the manual (Manual page 13)
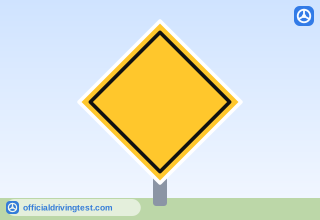
Plain yellow diamond
Warns you about conditions on or near the road
Manual page 24 · Open this page in the manual (Manual page 24)
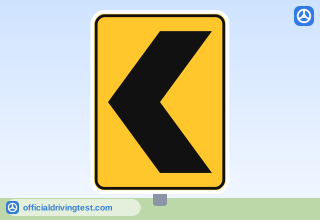
Chevron (left)
There is a sharp change in the direction of the road, such as a curve to the left or right. The road bends in the direction the chevron points. When used in a curve, there will be an advanced curve warning sign, and there may be several chevron signs placed throughout the curve.
Manual page 13 · Open this page in the manual (Manual page 13)
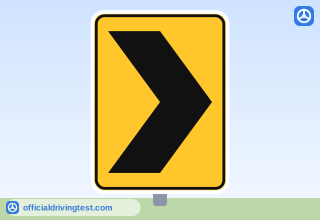
Chevron (right)
There is a sharp change in the direction of the road, such as a curve to the left or right. The road bends in the direction the chevron points. When used in a curve, there will be an advanced curve warning sign, and there may be several chevron signs placed throughout the curve.
Manual page 13 · Open this page in the manual (Manual page 13)
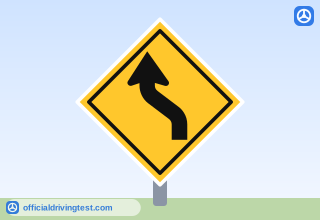
LEFT CURVE
The road curves ahead to the left. You need to slow down, stay in the center of your lane and prepare to navigate through the left-bending curve.
Manual page 13 · Open this page in the manual (Manual page 13)
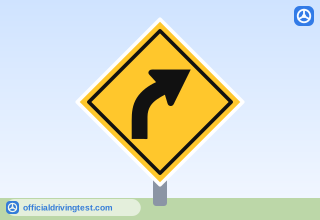
RIGHT CURVE
The road curves ahead to the right. You need to slow down and position your vehicle slightly to the right of the center of your lane, as you drive through the right-bending curve.
Manual page 13 · Open this page in the manual (Manual page 13)
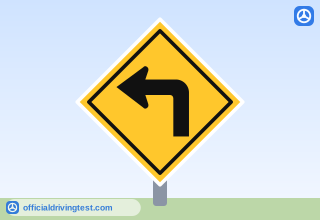
SHARP LEFT TURN
The road ahead turns sharply to the left. You need to slow down substantially, stay in the center of your lane and prepare to navigate through the sharp left turn. Some sharp turn signs have an advisory speed located on the sign or posted below it.
Manual page 13 · Open this page in the manual (Manual page 13)
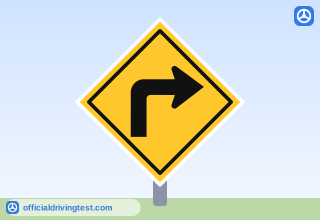
SHARP RIGHT TURN
The road ahead turns sharply to the right. You need to slow down substantially, position your vehicle slightly to the right of the center of your lane and prepare to navigate through the sharp right turn. Some sharp turn signs have an advisory speed located on the sign or posted below it.
Manual page 13 · Open this page in the manual (Manual page 13)
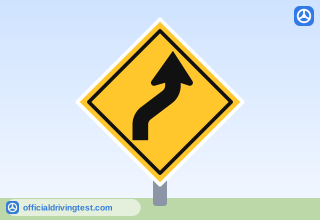
SET OF CURVES (right first)
The road ahead curves first in one direction and then back in the other direction (a set of two (2) curves). Slow down and prepare to navigate through the set of curves.
Manual page 13 · Open this page in the manual (Manual page 13)
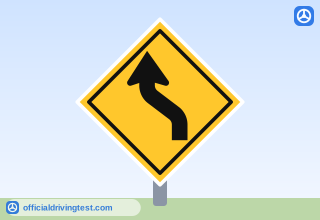
SET OF CURVES (left first)
The road ahead curves first in one direction and then back in the other direction (a set of two (2) curves). Slow down and prepare to navigate through the set of curves.
Manual page 13 · Open this page in the manual (Manual page 13)
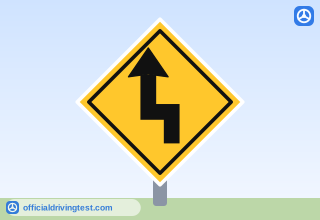
RIGHT AND LEFT SHARP TURNS (left first)
The road ahead turns sharply first in one direction and then back in the other direction. Slow down substantially and prepare to navigate through the set of turns.
Manual page 13 · Open this page in the manual (Manual page 13)
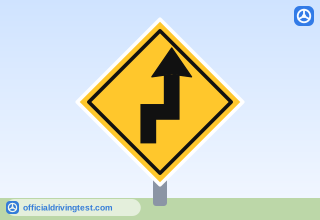
RIGHT AND LEFT SHARP TURNS (right first)
The road ahead turns sharply first in one direction and then back in the other direction. Slow down substantially and prepare to navigate through the set of turns.
Manual page 13 · Open this page in the manual (Manual page 13)
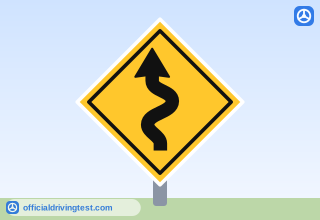
WINDING ROAD
This sign indicates there are three (3) or more curves in a row on the road ahead.
Manual page 14 · Open this page in the manual (Manual page 14)
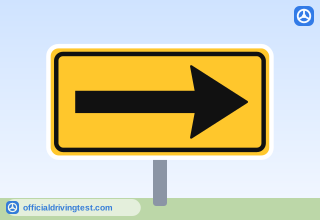
ONE DIRECTION LARGE ARROW
The road ahead changes direction at an extreme angle. Before you reach such an extreme curve, slow down as much as you would to make a turn at an intersection.
Manual page 14 · Open this page in the manual (Manual page 14)
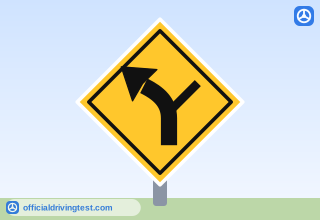
ROAD ENTERING CURVE
The main road curves to the left with a side road entering from the right. Approach the intersection with extra caution. A driver preparing to enter the main road may not be able to see you approaching from around the curve and may pull out in front of you, leaving you little room to avoid a crash, if you are traveling too fast.
Manual page 14 · Open this page in the manual (Manual page 14)
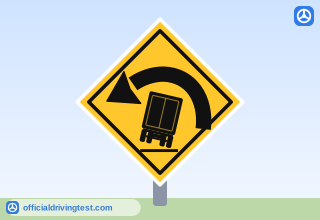
TRUCK ROLLOVER
This sign identifies curves where trucks traveling at excessive speeds have a potential to rollover.
Manual page 14 · Open this page in the manual (Manual page 14)
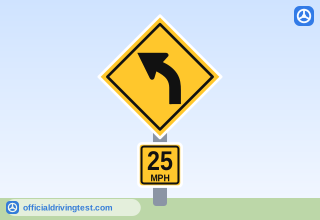
ADVISORY SPEED SIGN
This sign may be used with any diamond-shaped warning sign. The highest speed you should travel around a sharp left curve ahead is 25 mph.
Manual page 14 · Open this page in the manual (Manual page 14)
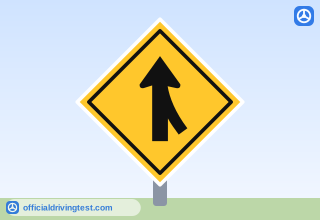
MERGING TRAFFIC
This sign is placed on a major roadway to tell you traffic may be merging into your lane from another roadway or a ramp. In this example, the traffic will be entering your lane from the right. Entering traffic must yield to traffic already on the major roadway.
Manual page 14 · Open this page in the manual (Manual page 14)
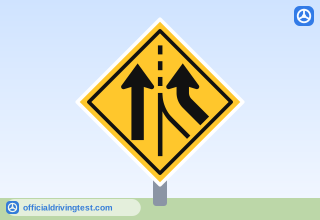
ADDED LANE
This sign is placed in advance of a point where two roadways meet. It means merging is not necessary because the entering traffic uses a new lane that has been added to the roadway.
Manual page 14 · Open this page in the manual (Manual page 14)
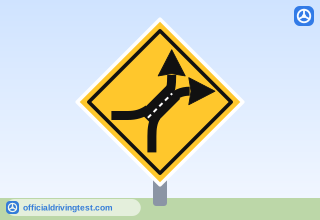
WEAVE AREA
This sign is used to warn that you will be merging with another roadway as some traffic is exiting and crossing your path.
Manual page 14 · Open this page in the manual (Manual page 14)
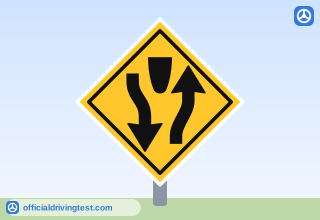
DIVIDED HIGHWAY BEGINS
The highway ahead becomes a divided highway with two one-way roadways and a median or divider separating traffic moving in opposite directions. Keep to the right of the divider or median.
Manual page 15 · Open this page in the manual (Manual page 15)
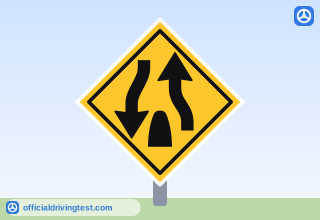
DIVIDED HIGHWAY ENDS
The divided highway on which you are traveling ends ahead. You will then be on a roadway with two-way traffic. Keep to the right of the centerline and watch for oncoming traffic.
Manual page 15 · Open this page in the manual (Manual page 15)
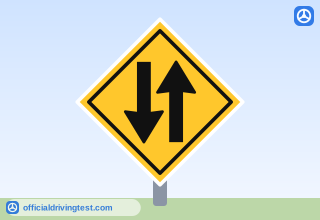
TWO-WAY TRAFFIC AHEAD
The one-way street or roadway ends ahead. You will then be traveling on a road with two (2) lanes of traffic moving in opposite directions. Stay in your lane to the right of the centerline. This sign may also be placed at intervals along the two-way roadway.
Manual page 15 · Open this page in the manual (Manual page 15)
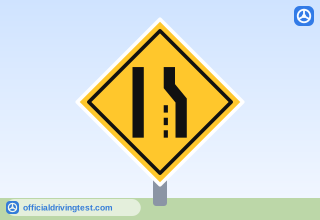
LANE ENDS
These signs tell you one (1) lane on a multi-lane roadway will end ahead. In these examples, the traffic in the right lane must merge left.
Manual page 15 · Open this page in the manual (Manual page 15)
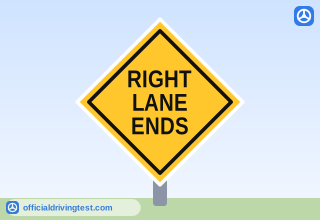
RIGHT LANE ENDS
These signs tell you one (1) lane on a multi-lane roadway will end ahead. In these examples, the traffic in the right lane must merge left.
Manual page 15 · Open this page in the manual (Manual page 15)
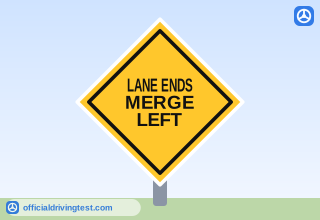
LANE ENDS MERGE LEFT
These signs tell you one (1) lane on a multi-lane roadway will end ahead. In these examples, the traffic in the right lane must merge left.
Manual page 15 · Open this page in the manual (Manual page 15)
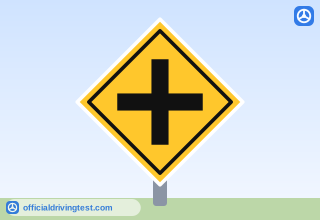
CROSS ROAD
The signs below show types of intersections. By showing you in advance how the roads join each other, the signs let you know when the road you are traveling on does not continue straight through the intersection. The signs also warn you about possible problems with the movements of other vehicles. Approach all of these intersection types with extra caution by searching ahead and preparing to slow down, if necessary.
Manual page 15 · Open this page in the manual (Manual page 15)
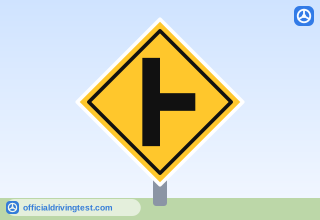
SIDE ROAD
The signs below show types of intersections. By showing you in advance how the roads join each other, the signs let you know when the road you are traveling on does not continue straight through the intersection. The signs also warn you about possible problems with the movements of other vehicles. Approach all of these intersection types with extra caution by searching ahead and preparing to slow down, if necessary.
Manual page 15 · Open this page in the manual (Manual page 15)
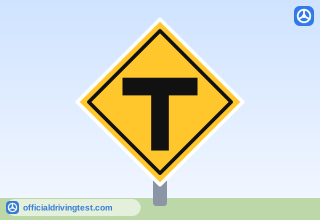
"T" INTERSECTION
The signs below show types of intersections. By showing you in advance how the roads join each other, the signs let you know when the road you are traveling on does not continue straight through the intersection. The signs also warn you about possible problems with the movements of other vehicles. Approach all of these intersection types with extra caution by searching ahead and preparing to slow down, if necessary.
Manual page 15 · Open this page in the manual (Manual page 15)
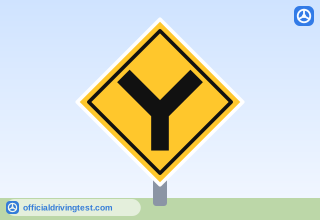
"Y" INTERSECTION
The signs below show types of intersections. By showing you in advance how the roads join each other, the signs let you know when the road you are traveling on does not continue straight through the intersection. The signs also warn you about possible problems with the movements of other vehicles. Approach all of these intersection types with extra caution by searching ahead and preparing to slow down, if necessary.
Manual page 15 · Open this page in the manual (Manual page 15)
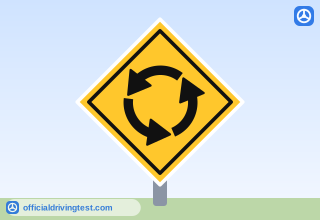
CIRCULAR INTERSECTION
The signs below show types of intersections. By showing you in advance how the roads join each other, the signs let you know when the road you are traveling on does not continue straight through the intersection. The signs also warn you about possible problems with the movements of other vehicles. Approach all of these intersection types with extra caution by searching ahead and preparing to slow down, if necessary.
Manual page 15 · Open this page in the manual (Manual page 15)
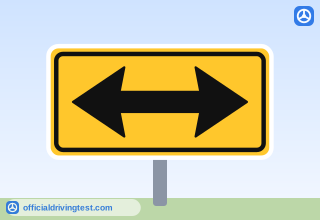
TWO DIRECTION LARGE ARROW
This sign is placed at the far side of a T-intersection to tell you that you can only go left or right. The road you are on does not continue straight through at the intersection.
Manual page 15 · Open this page in the manual (Manual page 15)
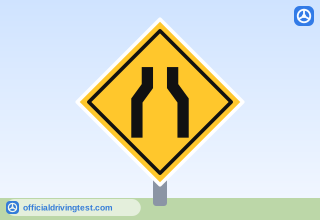
NARROW BRIDGE OR UNDERPASS AHEAD
Each lane on the bridge or underpass becomes narrower, and there generally is no shoulder. You need to slow down and make sure you stay in your lane. If a driver approaching from the opposite direction has a wide vehicle or is taking up part of your lane, wait until they clear the area.
Manual page 15 · Open this page in the manual (Manual page 15)
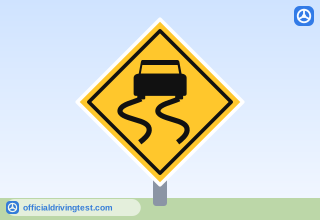
SLIPPERY WHEN WET
Especially slippery conditions exist when wet. In wet weather, reduce your speed and increase your following distance. Do not accelerate or brake quickly. Make turns at a very slow speed.
Manual page 15 · Open this page in the manual (Manual page 15)
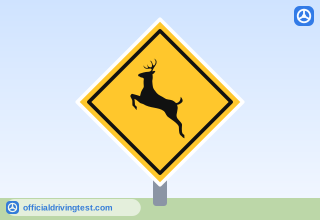
DEER CROSSING
This sign is posted in areas where deer frequently cross and crashes with deer have occurred.
Manual page 16 · Open this page in the manual (Manual page 16)
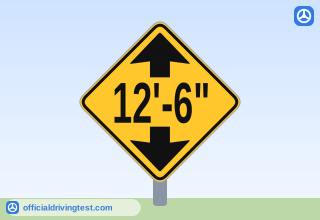
LOW CLEARANCE
This sign may be placed on an underpass, or at the entrance to a tunnel or parking garage. Do not enter if your vehicle is taller than the height listed on the sign.
Manual page 16 · Open this page in the manual (Manual page 16)
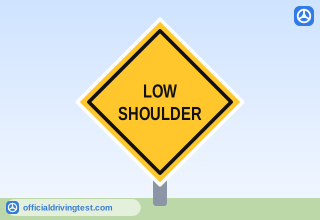
LOW SHOULDER
These signs are placed in advance of locations where the shoulder is lower than the road or the shoulder is soft (not paved). The LOW SHOULDER sign is used where the shoulder is as much as three (3) inches below the level of the road. The SHOULDER DROP OFF sign is used for even more severe drop-off situations.
Manual page 16 · Open this page in the manual (Manual page 16)
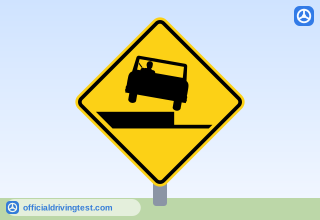
SHOULDER DROP OFF
These signs are placed in advance of locations where the shoulder is lower than the road or the shoulder is soft (not paved). The LOW SHOULDER sign is used where the shoulder is as much as three (3) inches below the level of the road. The SHOULDER DROP OFF sign is used for even more severe drop-off situations.
Manual page 16 · Open this page in the manual (Manual page 16)
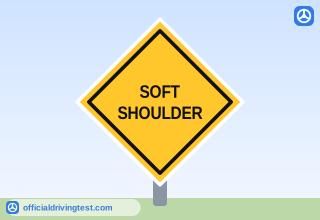
SOFT SHOULDER
These signs are placed in advance of locations where the shoulder is lower than the road or the shoulder is soft (not paved). The LOW SHOULDER sign is used where the shoulder is as much as three (3) inches below the level of the road. The SHOULDER DROP OFF sign is used for even more severe drop-off situations.
Manual page 16 · Open this page in the manual (Manual page 16)
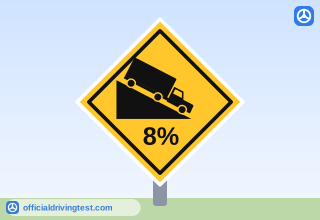
HILL / DOWNGRADE
There is a steep hill ahead. Slow down and be ready to shift to a lower gear to control your speed and to save wear and tear on your brakes.
Manual page 16 · Open this page in the manual (Manual page 16)
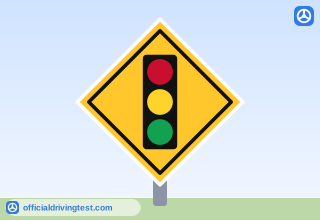
TRAFFIC SIGNAL AHEAD
A traffic signal is present at the intersection ahead. You may not be able to see it because of a curve or hill. If the light is red (or if the light has just turned green), a line of vehicles may be stopped ahead. When you see this sign, slow down and prepare to stop, if necessary.
Manual page 16 · Open this page in the manual (Manual page 16)
Traffic signal ahead (blank lenses)
The manual does not state it
Manual page 25 · Open this page in the manual (Manual page 25)
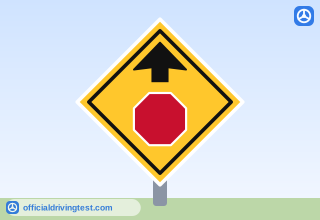
STOP SIGN AHEAD
A STOP sign is present at the intersection ahead. You may not be able to see it because of a curve, hill or something else blocking your view. There also may be a line of vehicles stopped ahead at the STOP sign you cannot see. When you see this sign, slow down in preparation to stop.
Manual page 16 · Open this page in the manual (Manual page 16)
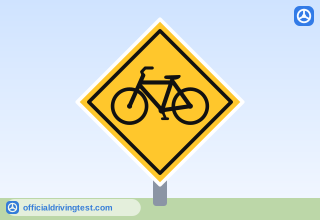
BICYCLE CROSSING AHEAD
Bicyclists may be crossing your path ahead. Be prepared to slow down, if necessary. This sign may have either a yellow background (as shown) or a fluorescent yellow-green background.
Manual page 16 · Open this page in the manual (Manual page 16)
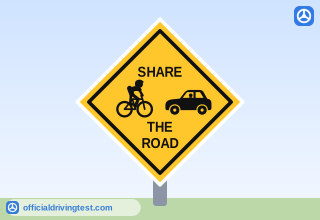
BICYCLE / MOTOR VEHICLE SHARE THE ROAD
Used at roadway pinch points (no shoulder, narrow lanes, etc.) to warn you, as a motorist, to provide adequate space for bicyclists to share the roadway.
Manual page 17 · Open this page in the manual (Manual page 17)
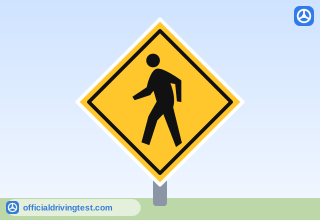
PEDESTRIAN CROSSING
Used at a marked crosswalk or in advance of locations where pedestrians may be crossing your path. Be prepared to slow down or stop, if necessary. This sign may have either a yellow background (as shown) or a fluorescent yellow-green background.
Manual page 17 · Open this page in the manual (Manual page 17)
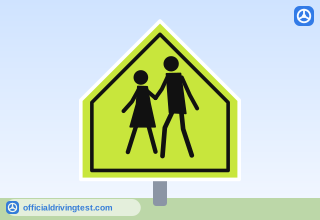
SCHOOL
This is the only pentagon-shaped sign used on the roadway. It means you are approaching a school zone. If the sign is accompanied by a downward-pointing arrow, it means you are at the school zone crosswalk. You should slow down, watch for children crossing the road and stop, if necessary. This sign may have either a yellow background (as shown) or a fluorescent yellow-green background.
Manual page 17 · Open this page in the manual (Manual page 17)
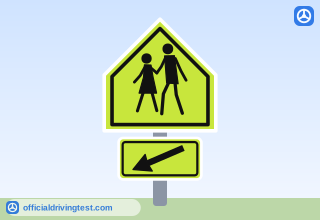
SCHOOL with arrow plate
If the sign is accompanied by a downward-pointing arrow, it means you are at the school zone crosswalk.
Manual page 17 · Open this page in the manual (Manual page 17)
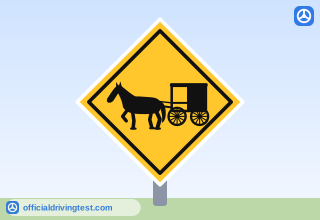
HORSE-DRAWN VEHICLE
This sign is posted in areas where slow moving, horse-drawn vehicles cross or share the roadway with motorized vehicles.
Manual page 17 · Open this page in the manual (Manual page 17)
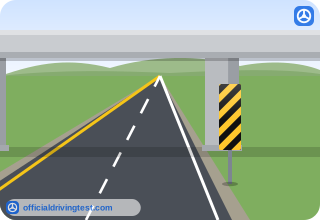
Right hazard marker (keep left)
Objects close to the edge of the road sometimes need a marker to warn drivers of the potential danger. These include underpass supports, ends of bridges, guiderails and other structures. In some cases, there may not be a physical object involved, but rather a roadside condition such as a drop-off or an abrupt change in the roadway alignment. Such roadside objects and conditions are indicated by the following markers, where the stripes are angled down in the direction you need to move to avoid the hazard:
Manual page 17 · Open this page in the manual (Manual page 17)
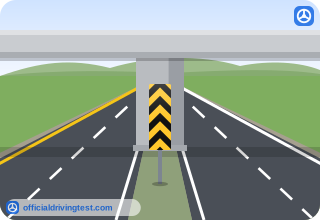
Center hazard marker (keep left or right)
Objects close to the edge of the road sometimes need a marker to warn drivers of the potential danger. These include underpass supports, ends of bridges, guiderails and other structures. In some cases, there may not be a physical object involved, but rather a roadside condition such as a drop-off or an abrupt change in the roadway alignment. Such roadside objects and conditions are indicated by the following markers, where the stripes are angled down in the direction you need to move to avoid the hazard:
Manual page 17 · Open this page in the manual (Manual page 17)
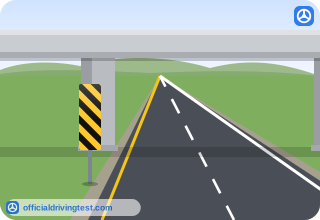
Left hazard marker (keep right)
Objects close to the edge of the road sometimes need a marker to warn drivers of the potential danger. These include underpass supports, ends of bridges, guiderails and other structures. In some cases, there may not be a physical object involved, but rather a roadside condition such as a drop-off or an abrupt change in the roadway alignment. Such roadside objects and conditions are indicated by the following markers, where the stripes are angled down in the direction you need to move to avoid the hazard:
Manual page 17 · Open this page in the manual (Manual page 17)
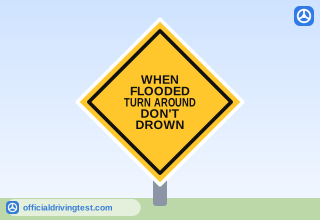
WHEN FLOODED TURN AROUND DON'T DROWN
If you are driving and you reach a flooded roadway, remember this simple phrase: "Turn Around, Don't Drown®". Find another travel route and do not attempt to cross any flooded roadway. It is against the law to pass any flood control barrier.
Manual page 62 · Open this page in the manual (Manual page 62)